
From Clomosy Docs
Only Premium accounts can be used.
Human Resources Project
For the human resources project: It is a project that the working personnel can do via mobile to create their requests such as leave and advance payment from the enterprise.
After creating the project for this:
The code we will initially write on the Main Code:
begin
Clomosy.OpenForm(ftTasks,fdtsingle,froAddNewDetail,ffoNoFilter);
end;
Click on Management and enter the Tasks field. Then we will fill in the properties in the "Task's Settings" field.
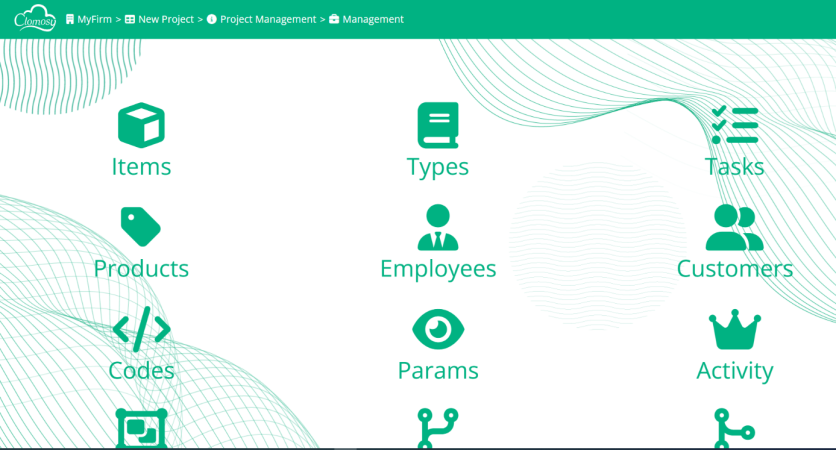
Management Screen

Task Setings Screen


We will activate the features on the Task Settings Screen screen. For this, we need to make the following settings:
Show Edit Button: Here, we need to give 1 value to the Value Integer field.
InputFields: These are the fields that will be included in the document to be created. We write the following variables in the Value Text field:
Task_Name, Task_Category_ID, Task_description, Task_priority, Task_status, Task_datedue,T ask_DateCompleted.
DisabledInputs: It is a field that normal users cannot change. We write the Task_Status value in the Value Text field.
FieldCaptions: You can write custom header values in the fields where you write InputFields.
Example: "Item_Name":"Item Title", "Item_Code":"Code" vs.
FieldsDefaults: Here we can enter the values that will be loaded automatically when the document is created.
Example: "task_Status":"0","Task_Category_ID":"1"
EnableFieldsForTopUserOnEdit: It is the area that the administrators will change in the hierarchy to be created among the users in the project. Here we write Task_Status in the Value Text field.
RestrictRecords: We will use the hierarchy in the project by giving the Value Text part of this field a value of 2. In this way, we will ensure that a top manager approves the document.
Task Status: Here we set the task status for selection.
In the Value text part, we write: Pending; Approved; Rejected.
Task Category ID: We have to set the task category IDs. These are: Regular Leave; Annual Leave; Advance Request.
After adding all the data here, we should save the changes we made.
After this stage, we click on management again and go to the Hierarchy area and come to the place where we will select the person who will approve the documents in the project as the top user.
Here you need to select one Top Members. Then we choose SubMembers. We save the changes we made.

Job Assignment:
In order to make the job assignment project, you need to write the following code in the Main Code. The UserGUID of the manager who will assign the job will be determined and written in the if below.
begin
 IF Clomosy.AppUserGUID = '3S1R3D9794' Then
 begin
  ShowMessage(Clomosy.AppUserGUID);
  Clomosy.OpenForm(ftMembers,fdtsingle,froReadOnly, ffoNoFilter);
 end else
 begin
  Clomosy.OpenFormParams.OpenFormTemplate := ftTasks;

 Clomosy.OpenFormParams.CustomBackFormGUIDFiledValue:=Clomosy.AppUserGUID;

 Clomosy.OpenFormParams.CustomBackFormSelectedFilter:='';

 Clomosy.OpenFormParams.CustomBackFormValuesOverWrite:=True;
  Clomosy.OpenFormParams.OpenDisplayType := fdtsingle;
  Clomosy.OpenFormParams.RecordOption := froReadOnly;
  Clomosy.OpenFormParams.FilterOption := ffoDoFilter;
  Clomosy.RunOpenForm(Clomosy.OpenFormParams);
 end;
end;
After this stage, we pass the Hierarchy. As you can see in the picture below, BotAndM3 user becomes a Sub Member of all users. BotAndM3 actually becomes an administrator. That way, anyone can get a job.

Library Project
The library application developed at Clomosy makes it easier for people to borrow and return books digitally.
In the library app:
- Borrowing books
- Returning a book
- Book selection
- Commenting on the book
- Satisfaction and complaint reporting
- Determine the date you receive and deliver the book
- It offers opportunities such as taking pictures.
Application Making
We create a company in the Clomosy application, then add a project to the company.
After the project is created, we write the following code in the Main Code section of the page that appears:
begin
 Clomosy.OpenForm(ftEmployees,fdtsingle,froAddNew,ffoNoFilter);
end;
What we wanted to do in the code block we defined:
- ftEmployees: Open employees page when Clomosy's form page is opened
- Fdtsingle : When you select it, the data comes straight.
- froAddNew : With this option, you can add the selected fitems in ftcustomers mobile.
- ffoNoFilter : You should use this value if you want the same data to be shown to users. If you want different data to be displayed, you need to use ffoDofilter.
Let's get the code in the "Project Activation Code" section at the top left of the page we are on. Then we open the application on our mobile device and write the code there. Now we follow our project on mobile.
By clicking the Management button in the lower left part, we perform the following operations in order.
Let's go to Management>Types. From here, let's click on the '+' button in the upper right corner of the picture and save the data added in the picture.

Let's go to Management>Products. Let's add our books here. You can add the products you want.
Finally, we enter the Management> Employees section and add the employee information. (The employee information is available below. You can add the data you want.)

Now we can start the screen design of our project by clicking Management>Thread.
Click the '+' button in the upper right corner of the phone screen that appears as soon as the Thread is clicked. Here we will add the tools we need in the toolbox:
| Tools You Need | Values that will appear on the screen |
|---|---|
| Thread_GUID | Old Records |
| TType_GUID | Buy or Return a Book |
| Product_GUID | Book Name |
| Value_Text | Description |
| Value_Start_Date | Book Purchase Date |
| Value_End_Date | Book Delivery Date |
| Img_GUID | Picture |
Now that we have created our screen, we can move on to the coding part. Let's go to Management>Code. In the content section on the left as seen below:
- Forms : ITEMS.SCRIPT
- User/Normal : Form
- Events : ListView.OnBeforeClick
choose.
In the code part, we write the following code. Then click the save button in the upper right corner. We save it to the project.
Code:
Clomosy.ResumeLocalEvent = False;
Clomosy.OpenForm(ftEmployees,fdtSingle,froAddNew,ffoNoFilter);
What does it mean in the code?
- When you click on the data you entered after the first screen you specified, the data you entered in Employees will appear, and when you click on this field, the screen you designed will appear on the Thread screen.
- Fdtsingle : When you select it, the data comes straight.
- froAddNew : With this option, you can add the selected fitems in ftcustomers mobile.
- ffoNoFilter : You should use this value if you want the same data to be shown to users. If you want different data to be displayed, you need to use ffoDofilter.

App Usage and Settings
As soon as you enter the application, you are directed to the page where the library staff (Employees) are located on the screen. Here you can choose one of the librarians you want. After the officer selection, you are directed to the transaction page.
On the screen below, you make a choice by clicking the three lines button on the right side to choose one of the processes of buying or returning a book in the first box. You can choose the book by clicking the three lines button next to the box written with the Book Name. Then you can write your comments, satisfaction and complaints or suggestions about the book in the description box. Then you enter the date you buy the book and the date you will deliver the book. If you want to add a picture later, you can click on the gallery to take a picture or choose a picture from the gallery. After adding the information, the recording is performed by clicking the save button in the upper right corner.

As soon as the registration is done, it returns to the main screen. Below is the main screen image after registration. Now, let's determine the button colors on the screen and set how the entered data will be displayed on the screen.

Spot colors to the left of librarians:
- Red : Indicates that the delivery date of the book has passed.
- Green : Indicates that there is still time for the book to be delivered.
- Blue : After delivering the book, the dot turns blue, indicating that it has been delivered.
After typing the codes, do not forget to save them by clicking the "Save" button.
Making of spot colors:
Since the dots will appear next to the library staff, we click on Management>Employees. After clicking on Employees, we scroll down the page. Click the "Show Mobile Feature" button at the bottom. Then we click on the blue dot on the opened phone and write the following codes in the blank:
Code:
Case when Thread_TType_ID = '001' then

   CASE when Datediff (day,[Thread_Value_End_Date],getdate()) >= 0 THEN ISNULL('clCRed','')  ELSE ISNULL('clCGreen','') END

else ISNULL('clCBlue','') end
What does it mean in code?
If the ID of the value (Get Borrowed Book) drawn from Types on the Thread screen is 001
If the time difference between the delivery date and today's date is greater than or equal to 0, let the red dot be.
If the above condition is not met, let it be a green dot.
If the first condition above, that is, the ID of the value drawn from the types on the Thread screen, is not 001 get the blue dot.
How can the date and time of the person who will borrow the book be displayed on the right of the employee?
Click on the "Top Text" section on the phone that opens and write the following code in the blank.
Code:
ISNULL(Thread_DateExpl,'')
How to display the book chosen by the borrower under the employee's name?
Click on the "Sub Text" section on the phone that opens and write the following code in the blank.
Code:
ISNULL(Product_Name,'')
How to display the text written by the person who will borrow the book in the Value text on the Thread screen under the employee?
Click on the "Footer Text" section on the phone that opens and write the following code in the blank.
Code:
ISNULL(Thread_Value_Text,'')

Estate Agent Project
The real estate firm can record the residences, commercial areas and customers in its inventory. In addition, you can add products to your inventory.
When customers come to the company to rent or buy a housing, they are registered in the application (Management>Customers). This Customer's address, telephone and name are recorded.
Real Estate Firm can add products to its inventory; You can add the name, address and price of the product(Management>Products). Thanks to this project, real estate company customers are registered, inventory is created, sales calls are recorded.
Let's take a look at what we added in the project and how. To begin with, we want it to redirect to the Customer page as soon as the project is opened. For this reason, we call the Customer template in the "Main Code" field.
Code:
begin
 Clomosy.OpenForm(ftCustomers,fdtNone,froAddNewDetail,ffoNoFilter);
end;
Customers Page Settings
We will make edits within the page in the Customer template. When calling the page above, it was called "froAddNewDetail". By saying this, a detailed add button was opened on the page. When we open the Management>Customers page, we will show what we want to appear on this screen by filling the Input Fields and Field Captions fields in the Object's Settings field.
So what do we write in the fields?
Input Fields: Customer_Code, Customer_Name, Customer_Tel, Customer_Address
To give the names we want to these fields:
Field Captions: "Customer_Code":"Customer Code","Customer_Name":"Customer Name","Customer_Tel":"Customer Phone Number ","Customer_Address":"Customer Adress"

In order for the data received from customers to appear on the mobile screen:
 Show Mobile Feature:
| Area | Value |
|---|---|
| FOOTER TEXT: | ISNULL(ViewThreads.Thread_Value_Text,'') |
| SUB TEXT: | ISNULL(CUSTOMERS.Customer_Mobile_Phone,'') |
| TEXT: | ISNULL(CUSTOMERS.Customer_Name,'') |
| TOP TEXT: | dbo.PFn_DToEx(ViewThreads.Thread_Date,'tr') |
| CENTER TEXT: | ISNULL(ViewThreads.TType_Name,'') |
How it looks on mobile screen.

Items Page Settings
When the Customer template is clicked, it is directed to the Items page. In order to achieve this, CUSTOMERS.SCRIPT>Form>ListView.OnBeforeClick must be marked in the Management>Codes field and the following code must be written.
Code:
Clomosy.ResumeLocalEvent = False;
Clomosy.OpenForm(ftItems,fdtSingle,froReadOnly,ffoNoFilter);
We are adding 2 data in the Items template and now this page is ready.

Types Page Settings
We will pull data from the Types and Products templates on the Thread screen. In this, let's go to these templates at the beginning and make the definitions.
Let's click on Management>Types. Let's enter the required data here.

Let's by clicking on Show Mobile Feature enter the desired data on the Sort List screen.

Products Page Settings
In the project we are using the Product template to add products to their Inventory. Let's go to the Management>Products page. Here we have to fill the Input Fields and Field Captions fields in the Object's Settings field. For this:
Input Fields: Product_Code,Product_Name,Product_Description,Product_Price
To give the names we want to these fields:
Field Captions: "Product_Code":"Property Code","Product_Name":"Property Name", "Product_Description":"Property Adress","Product_Price":"Property Price","Page_Title":"Property Notes"

To list inventories for this product and show data on the mobile screen:
Show Mobile Feature:
| Area | Value |
|---|---|
| FOOTER TEXT: | ISNULL(PRODUCTS.Product_Description,'') |
| TEXT: | ISNULL(PRODUCTS.Product_Name,'') |
| CENTER TEXT: | CONCAT('Price: ',ISNULL(PRODUCTS.Product_Price,0)) |

In order to enable the add feature to the product guide screen on the Thread screen:
Going to the Management>Codes screen, we select Thread.Scripts>Form>BtnProduct.OnBeforeClik and we write the following code:
Code:
Clomosy.OpenForm(ftProducts,fdtGuide,froAddNewDetail,ffoNoFilter);
Clomosy.ResumeLocalEvent = False;
Thread Page Settings
Now that we have defined all the templates, let's create the Thread page. Here we will do the registration process. Let's go to Management>Thread. We will fill in the Visible List and Field Captions fields in the Thread's Settings field.
Visible List:
- [Thread_TType_GUID],[Thread_Product_GUID],[Thread_Date],[Thread_Value_Text],[Thread_Price]
Field Captions:
- "[Thread_TType_GUID]":"Customer Type","[Thread_Product_GUID]":"View Real Estate ","[Thread_Date]":"Date","[Thread_Value_Text]":"Note Field","[Thread_Price]":"Talked Price"

Thread screen view on mobile:
